Sunday, August 30, 2009

Bonus Pictures


Earthmud


These are pictures of the 1st and 3rd coat.
There will probably be two more coats.


So far we've only mudded the outside of the back/north
side of the house.

Tuesday, August 25, 2009

Windows!


The most energy efficient windows we could buy!


The windows on the south facing side are
Non Low E- meaning they aren't blocking any
sunlight from passing thru for maximum passive
solar heat in the winter.


Friday, August 21, 2009

Tuesday, August 18, 2009

Sewing the Walls


Fill in unevenness in the walls and cover
bales with stucco mesh/chicken wire.


The smiles are deceiving :)


Then the sewing begins and continues for a week straight.


Tuesday, August 11, 2009

Straw bale walls stacked in 1.5 days work!


Nothing like good friends lending a helping hand!


Initial steps in building the bale walls


Dura-wall (normally used in cinder block buildings)
used in between bales to add strength to the walls


Many bales had to be retied to new sizes to fit into the walls


Another form of bale alteration came in the form of
trimming with a weed wacker. Much harder than it looks.

Monday, August 10, 2009

Tar Paper to Red Roof


Step 1- Happy/Fed helpers make everything go faster!


Step 2- Tar paper


Step 3- Hire roofers who warranty their work to put on the metal.

Tuesday, August 4, 2009

Sheeting of the roof


Russ and Richard finish sheeting the roof!!!!!


It is the most beautiful sheeted roof I've ever seen!

Metal Hangers


Russ gets creative with the welder to make the
hangers to attach the top of the columns to the beams.


And BLAMO! One of a kind metal hangers!


This one is factory made- but still very nice.

Log Porch Columns


14"x10' logs $50 a piece. Sounds like a deal until you
realize that you have to make them pretty yourself.
Yea for Richard's help!


Russ routing out the bottom of columns to countersink
the metal plates- so they are safely attached to the
foundation and sit flush with slab.


A LOT of sanding later and we have 3 beautiful
natural porch columns on each side of our house!

Framing


It began with a double stack of treated 2x4's and 2x6's on
top of the footings running parallel around the perimeter of the house.
Then came the 2x12's and metal Simson Ties and we were vertical.


Box beams on top of the 2x12 posts- and we have the main supports for the roof.
Making our house a "Post and Beam House with Cellulose (strawbale) Insulation"
That is how the bank refers to our house.


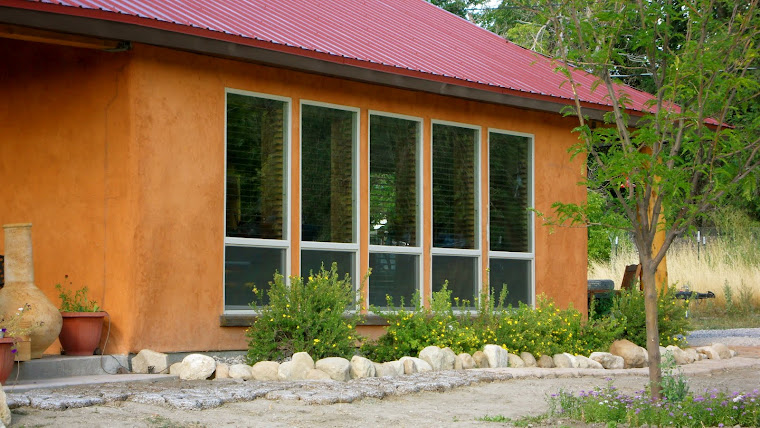
This is a view of the south facing wall that will have five large
windows for maximum passive solar heating in the winter.

(Passive solar means that we will be taking advantage of the
sunshine coming thru the windows in the winter and adding
extra free heat to the inside of the house)


Interior walls are framed like a regular "stick built" house.


Interior view of our open living, dining, kitchen room with
vaulted ceiling.

Pouring of the slab and staining the concrete


Mixed in the cement truck was a brown pigment making the
concrete a dark dark brown thru and thru.


Then we had a Jackson Pollock party with powdered
pigments thrown onto the service staining just the
surface of the concrete- it was super fun!

Radiant Floor


Gravel was poured between the footings and leveled.


Then came the $20 a sheet 2" blue foam board. We are the proud
owners of 70 of them!


Then the battle with, the very hard to work with, PEX tubing for the
radiant heated floor. Hot water will run thru the tubing heating the
concrete floor and therefore the whole house!